
I guess I should start with a disclaimer. I don’t know if this is actually the best way to white balance a video in camera. All I know is that I’m an amateur, and I’ve struggled with nailing down the white balance on my videos for a while. After someone showed me this method, my white balance is almost perfect every time right out of the camera.
Getting your white balance perfect is so important to getting a great image. Our eyes are really good at seeing if someone’s face is a little off, so getting the perfect tint and temperature along with the right mix of reds, greens, and blues, is super important for a great-looking video.
I use a Canon, so I’m not sure what the settings will look like in other brand cameras. But I imagine the concept is the same no matter which camera you’re using.
The first thing to do is get your scene set up the way you want. The background, set, lights, exposure settings, all of it. Make sure you do that with your subject in frame.
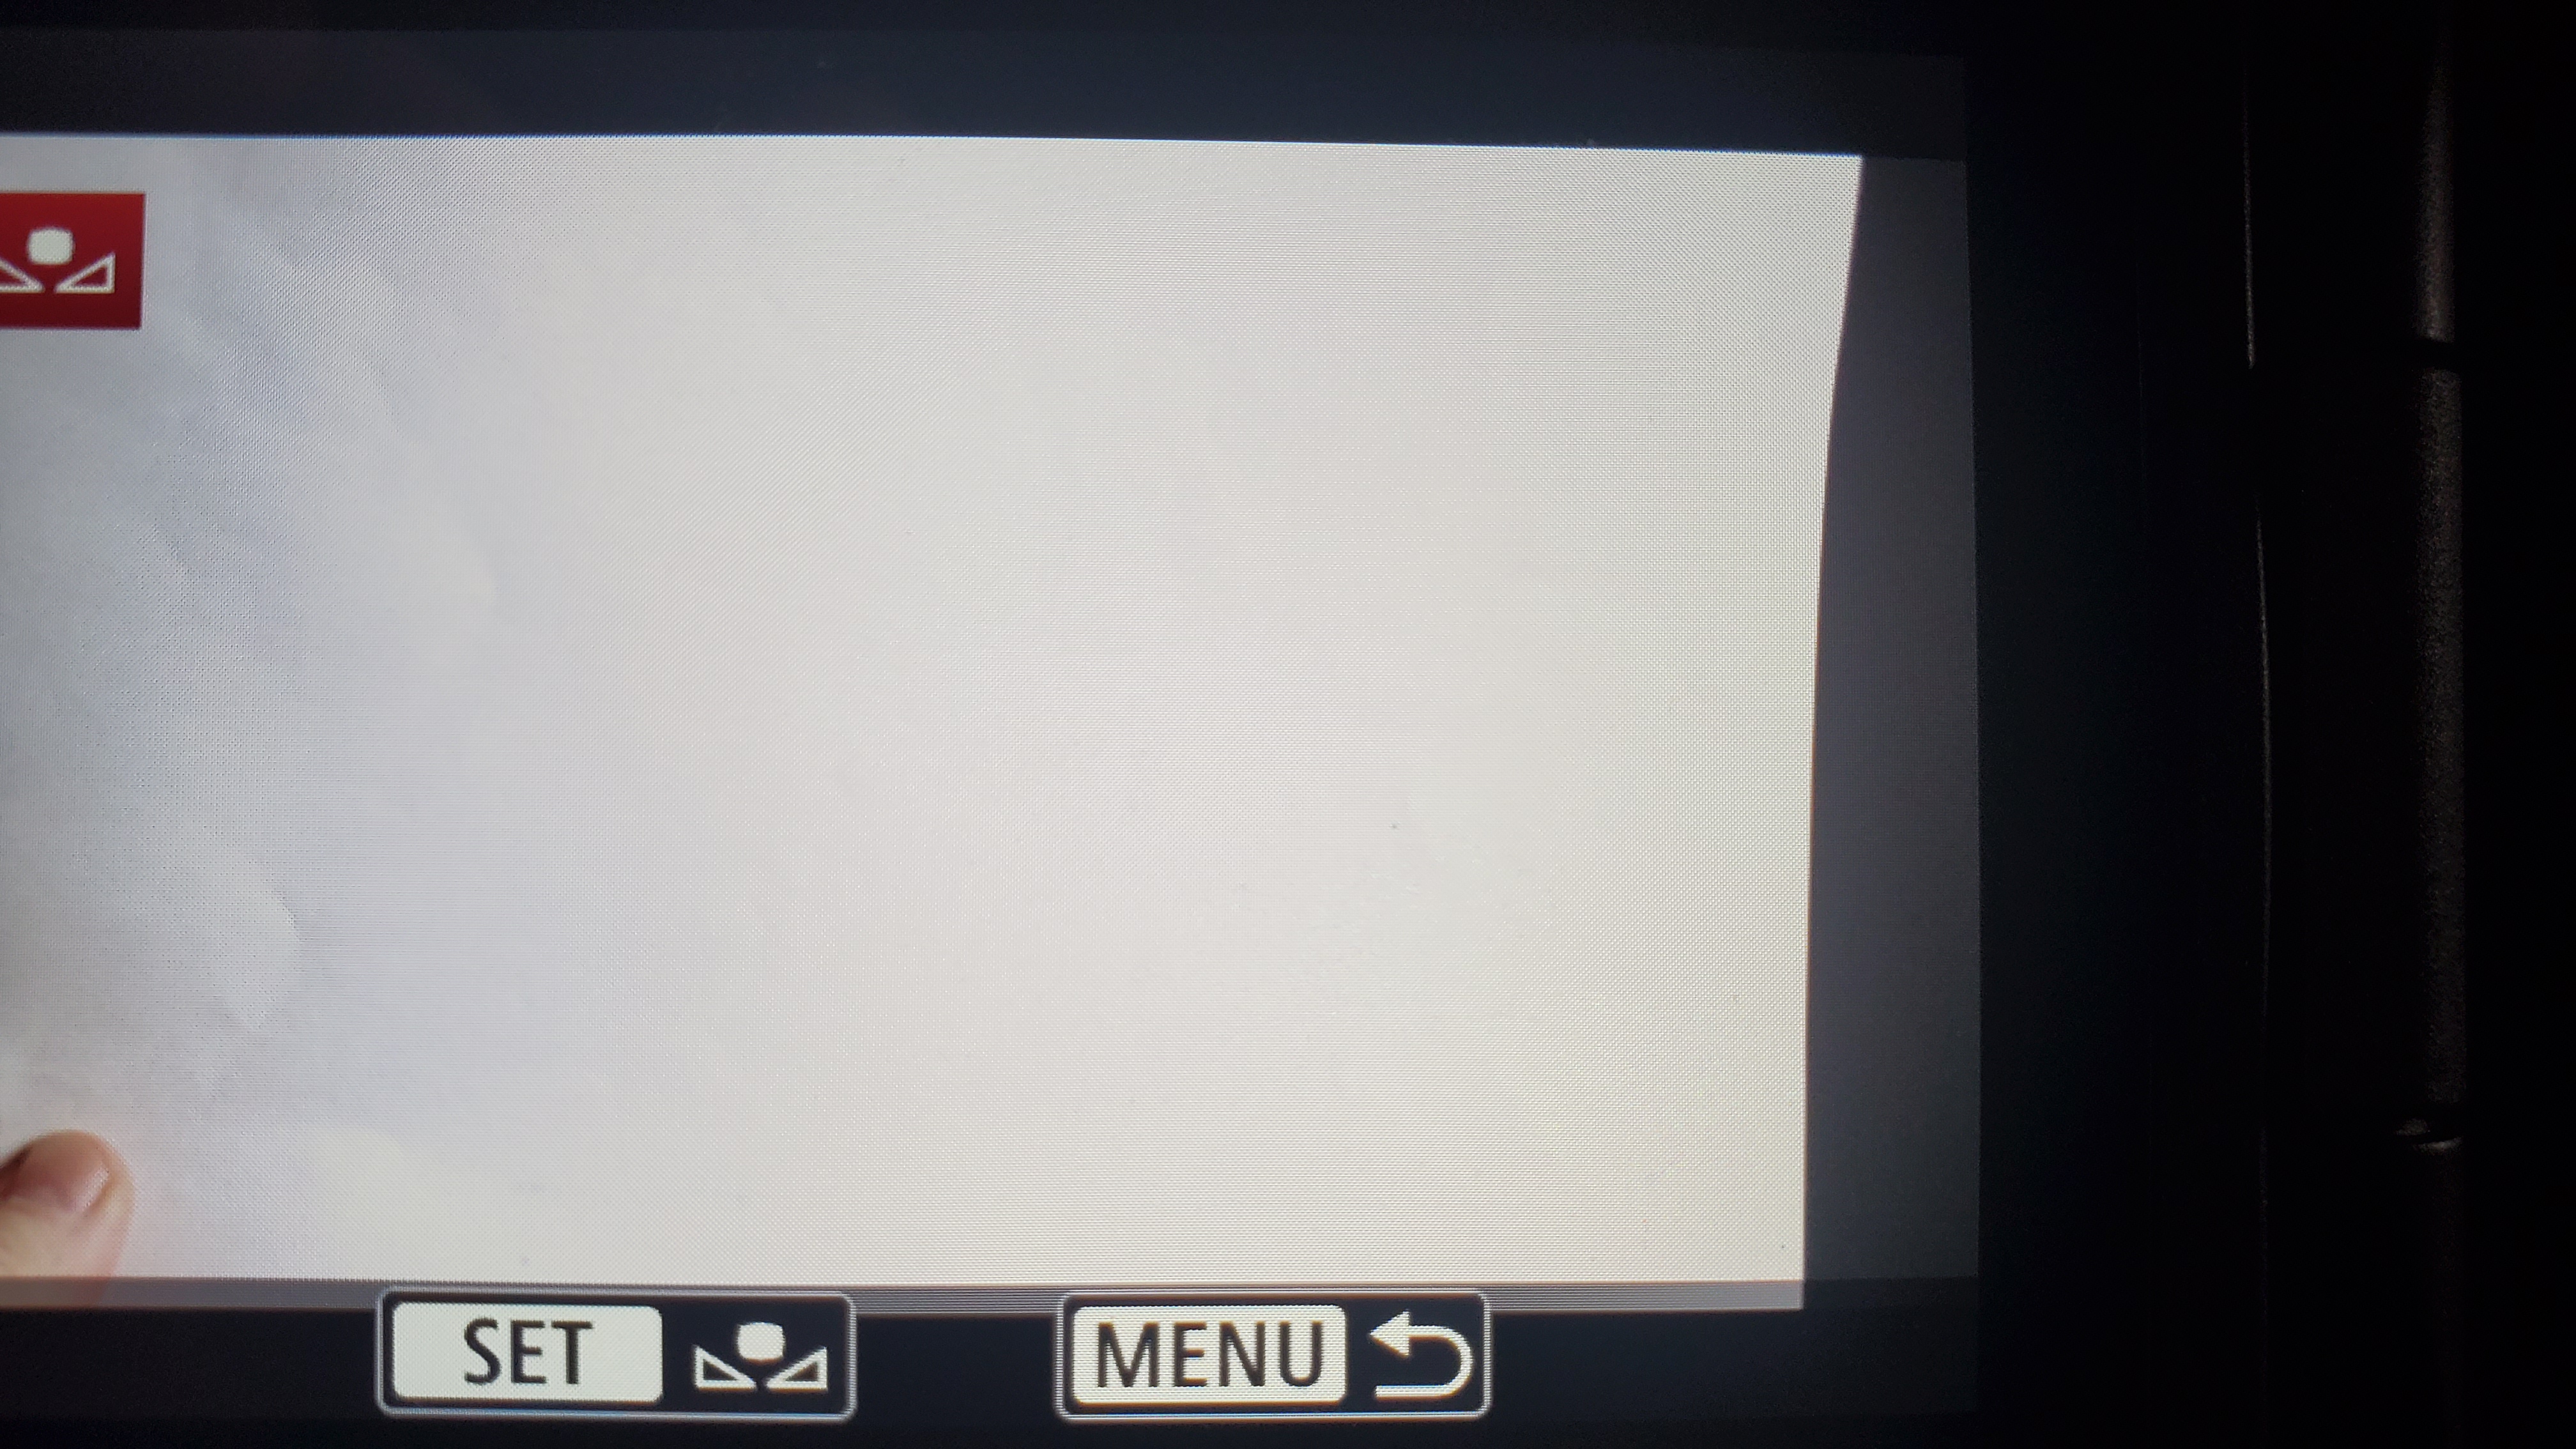
Next, get something that you know is pure white to put in front of the camera. Fancy people use photography color cards or a professional white/grey card, but I just use a piece of white printer paper. With your lighting set for your shot (use an exposure meter if you have one), take a still picture of that piece of paper making sure to fill up the entire field of view. Try to avoid any shadows. The picture should be a clean, even, bright white. This is now your white balance reference.
Now, go into your camera settings for white balance and set it to custom. It should prompt you to choose an image as your custom reference, which in our case is the picture we just took. In my camera, I go to the main camera menu, then select Custom White Balance, then it prompts me to choose a picture.

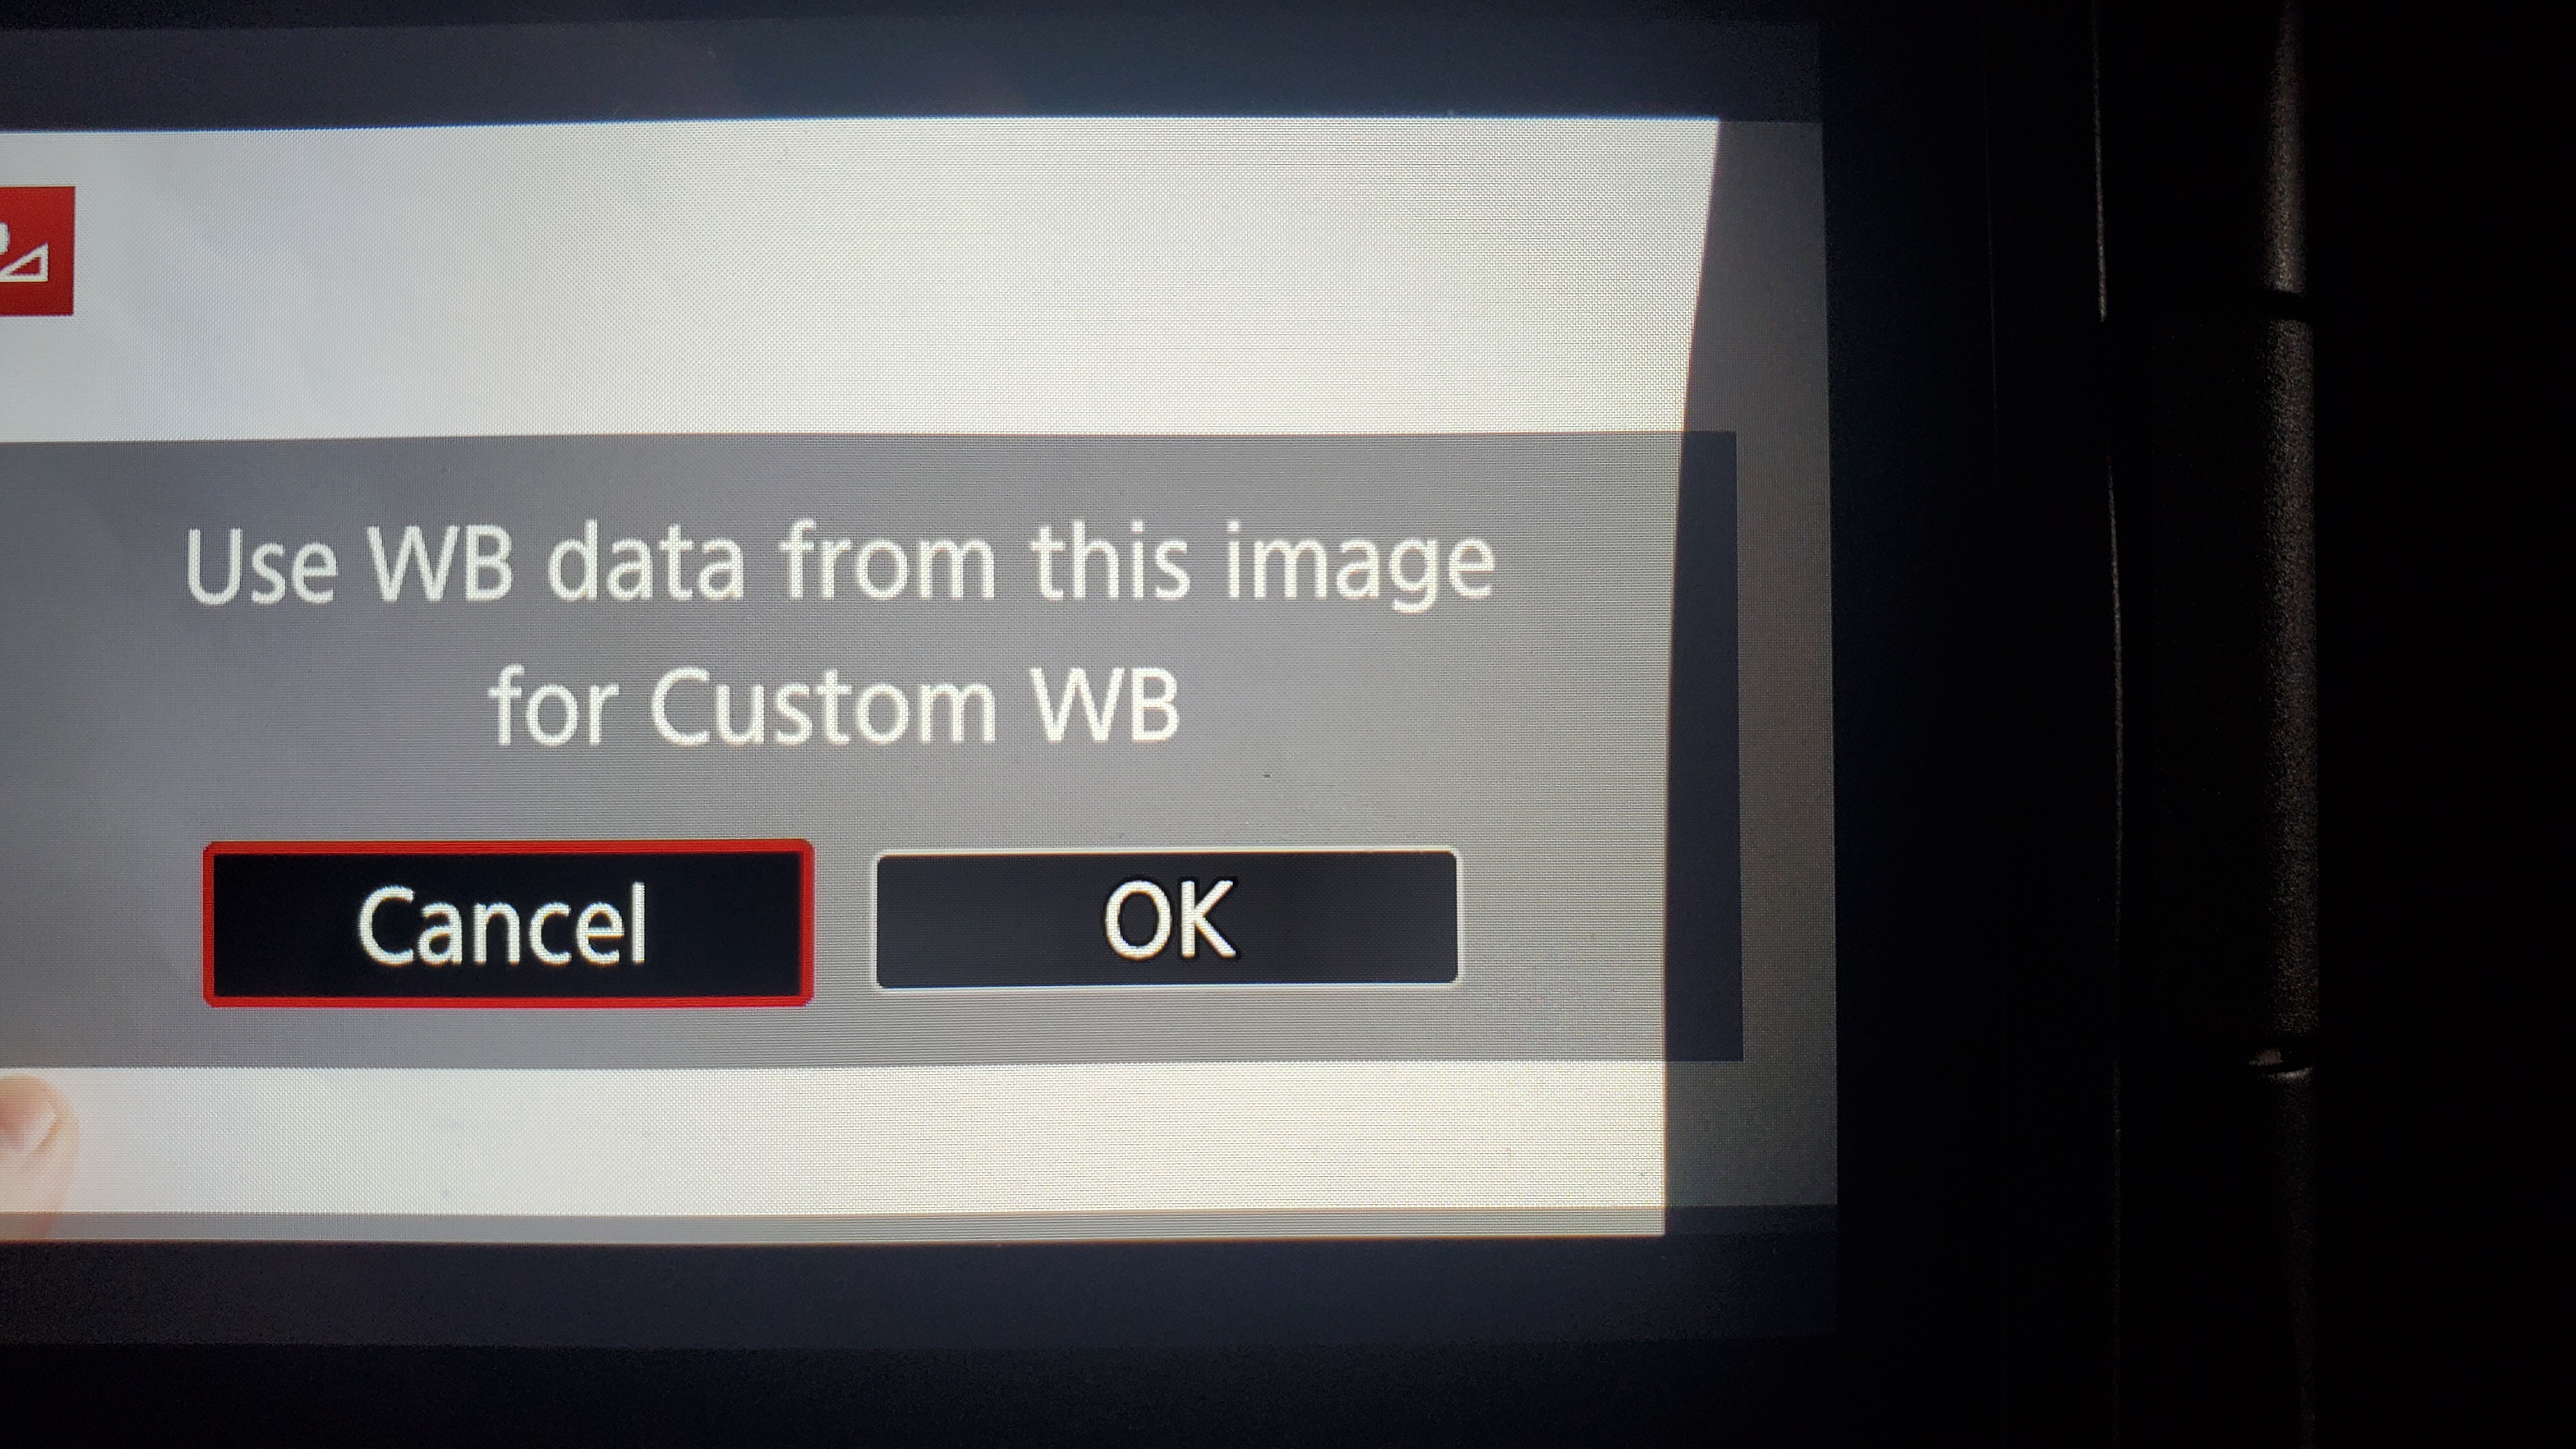
After getting to Custom White Balance in the menu, the camera gives me the option to choose a photo on the SD card. It’s usually the most recent one since I just took it, so I tap SET to select it.
It then explicitly asks if I want to use data from that image for Custom white balance. I select OK which makes it the new reference for the camera to automatically adjust the white balance. Now it will use this as the reference image for pure white and automatically adjust reds, greens, and blues accordingly.
I do this before every video shoot because the lighting will be slightly different every time. I use three or four different sets, and that along with the color of my shirt will change the dynamic of the white balance. In my opinion, it’s very important to dial that in every time you shoot rather than just set it and forget it.
You can always make adjustments to your white balance in software, too. I use Adobe Premiere Pro lately, and the color correction function isn’t bad. I’ve also used Davinci Resolve which is very powerful for both color correction and color grading, but honestly the best result will always come from having the absolute best quality image as possible right from the camera.
Of course there’s always a style and preference component as well. Do you want a cool, teal image? Maybe you want a dark and moody image with very little color saturation? Those things are very important, but I consider them part of color grading which I do (or don’t bother with) after color correcting which includes nailing down the white balance.
I’ve played with the manual white balance settings in my Canon, and you can certainly get very specific in exactly how you want the image to look. But this method is fast, easy, and seems to be right on the money every single time.
Thanks,
Phil


Leave a comment